And then I thought some more...
Then I stuck my nose in rule books and old and new codices...
Then I though bugger it, MORE MARINES!
I wanted to veer away from the dark colours and bleak looking troops I usually tend to go for. As we know, the bad guys don't always wear black.
Plus I wanted to try out more challenging colour schemes and new troop types and rules for the force.
Thus was born the ANGELS OF ECSTASY renegade chapter.
I popped into the shop (GW) and bought a lord and some marines for the princely sum of £34.50, along with some paint. Then I had to dodge the "why don't you come along to our game nights, why don't you buy a white dwarf, what armies do you have, isn't the chaos codex great, I love apocalypse, I love spearhead" kind of crap that the droids working there spew at me each time I go in. Geesh, if I wanted it, I would buy it. And I don't talk about apocalypse of spearhead AT ALL. They're just gimmicks to sell lots of miniatures and tanks to the unsuspecting public. The thing is, it ain't difficult to think up simple rules to play these type of games WITHOUT GW help. I mean, we're not all 'tards, are we?
Even when I was 12 (that's TWELVE YEARS OLD) I was thinking up these things. It's all just about the money nowadays. GW used to be cool, now they're corporate.
Sigh.
Anyways, back to the project!
Step 1- Construction
Now, I wanted to try and keep to the models supplied, but I also wanted to add my own brand of weirdness to proceedings. So, I got my cutting and trimming stuff together and washed all components in slightly soapy water first once the mould lines were removed. then I got out the glue and went to work. This took shape as we can see from the pics that follow:

This is the rear view of the lord, and it shows off the daemon weapon I kitted him out with. I took the head off the force weapon in the kit and stuck on the power axe head. Thus was born the "Glaive of Eternal Bliss" or big hitty thing as I like to call it. Basically it follows the codex rules for a Slaaneshi Daemon weapon, or "Blissgiver."
Also not the bits I stuck on the base for extra detail.

Same guy, front view. Note also the combi weapon (melta) and face style head I gave him. I also cut some scarring onto the face with a craft knife (remember kids, stay the fook away from sharp stuff wot can stick you!!!).
Along with these things, and to complete the model I went for the simpler looking trophy racks. I was going for simple and striking here, rather than over complex and stoopid. At this point I had a colour scheme in mind, but it was how to get there WITHOUT following the advice of GW cloned goons.

Here's some of the squad after construction. Notice all the marines carry icons on their backpacks. My fault, just thought it looked nice. This pic features the two special weapons and the icon to slaanesh. I also went for the blank shoulder pad to go on the left instead of the right (which is usual practice). This army was going to be a weird sight in every way I could go without resorting to putty and craziness. Remember- simple and striking!

There's the champion and the rest of the squad. I really do like the new CSM squad kit, as it includes plenty of character and the list of weapon upgrades is sweet! I now have several spare bits for possible inclusion in later units I add. Sweet. The I got my pin vice and drilled out the gun barrels for all the bolter weaponry ( I NEVER DO THAT).
With the leader and unit constructed and the glue dried, it was time to step on to the next stage. UNDERCOATING.
Stage 2- Undercoating
Stage 2- Undercoating
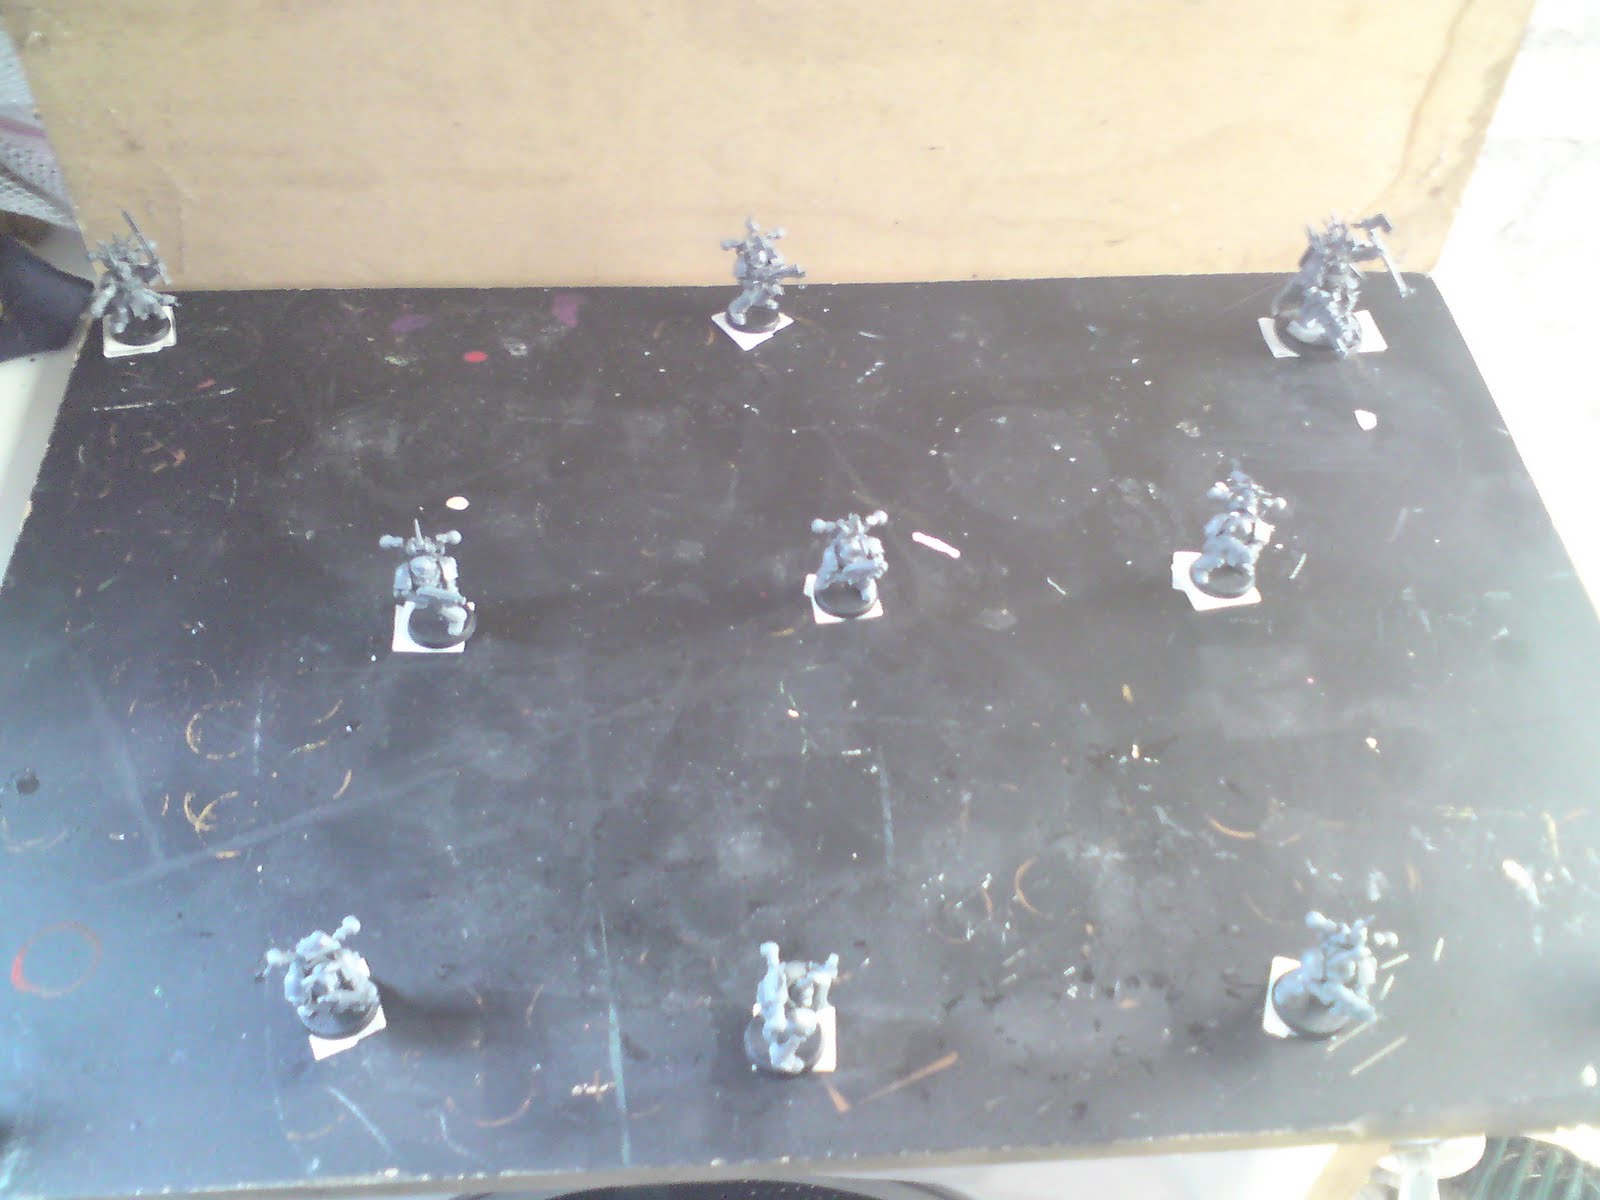
First thing was to go for skull white spray. Again a MAJOR step away from the usual black spray. This would make the models lighter and mean I would need to be more precise when applying colours later, so as not to leave any white bits in corners and crevices!
As we can see from the pic above, I put the models on a piece of mdf and used masking tape to hold them still. I have been spraying using this method for EONS now and it ain't let me down yet!
The it was off outside to a WELL VENTILATED AREA (kids take note) to give em a good dusting with the spray.

Here's the Lord. As you can see I gave all the models a single coat of white. Some prefer several coats, but it's just not my way. I try to make my paints go as far as possible so as to save cash and maybe the environment a little too (honestly though, I dunno). A single thin coat goes a long way to ensuring that the colours you apply go on well without obscuring the details.

Here are the models after spraying. The black board is now white (duh!) and the models all got a good coat. I try to space them out as much as possible so that I can move the can all around them as I spray, hopefully this pic shows that. Notice the second mdf board behind the models that I used to protect other stuff from the dreaded over spray. With that all done it was time to get the models indoors and get the paints out!
Stage 3- Base coating
This took actually 2 stages of painting, with very careful brushwork, which is hopefully explained in the pics...
In keeping with my choicest deity of Slaanesh, I went for bright colours, but chaos ones just the same. I opted for a patterned finish with purple and white. There would be no detail work done on shoulder guards trims etc, just two bold colours. I wanted the troops to stand out on the battlefield and be appreciated for the colours, but not to the extent where you would need to look closely at the details. Like I said- SIMPLE and STRIKING.

Here are some of the marines with the base coat applied. Warlock purple one half and fortress grey the other half. Note that even the horns are in the colour scheme, not bone coloured. I knew at this point I had definitely picked the right colour scheme! After this initial stage I went further and base coated flesh and metals.

Here's the lord with the complete base coat applied. Black for the cloth and weapons, bestial brown for the flesh, and shadow grey on the stonework of his base, though this would be brownish later if all went to plan.

Likewise with the marines. Now in the books etc it says that you can game with models in this state, worth bearing in mind I suppose...
I like to paint models in groups of at least 10. This allows time for the first model to dry as you paint the others, so you can knock out loads of models in an afternoon of the same quality of paintwork. I does have the necessity for the painter to have that degree of concentration to not get bored by what he's doing. I find that tunes help, along with regular sips of water/ juice/ coffee/ tea and sometimes lager ( ALL HAIL BEER)- though not best in the morning, that last one!!!
I started this method of painting back when I played fantasy battle (50 orcs in an afternoon- easy).
I also found that this method honed my techniques with the brush, colours and shading. I am self taught when it comes to this kind of thing. To that end I don't take well to being told how to shade up to white by a GW clone half my frikkin age! (Basically I told him to get back in his box and stop giving advice to veterans when he's only a damn rookie- shit...)

Last up- more marines! Black for the weapons, human sized skulls and any cloth work/ pouches etc. The feel of the army was starting to come out now, and I was buzzing from it!
Stage 4- shading and highlights
Almost done. The general shape of the colour scheme was there, I just had to accentuate it now and add that vibe to the weapons etc. Break out the bolt gun metal and the inks!!!
I shaded the purple (liche purple or warlock purple- whichever is darker, I forget) with old style purple ink, the highlighted with liche/warlock purple and finally the lighter shade of purple on the top.
The grey got a dash of watered down armour wash, the highlighted up via grey to skull white. Next time I won't water down the ink, as the shading could have been a bit better on the white.
The blacks that weren't weapons got a good old bolt gun metal followed by armour wash then chainmail shade and highlight. For blades I went up another notch to mithril silver. This made the power sword of the champion really bright.
Then it was on to the reds for eyes and red dot laser sights and hey presto! We were there!!

There's the lord again! I went for purple ink to shade the blade for the daemon weapon. This gives it a "unholy hue" that I really like alot. The weapon stands out to, without overpowering the colour scheme. Nice!!! The flesh on this model (and the others too) was built up from bestial brown with chestnut ink through bronzed flesh, then elf flesh and finally bleached bone. I wanted the models in this army to have really pallid flesh. This seems to suit the Slaaneshi ideals of perfumes, excesses of beauty (though twisted) and pleasure etc.

Here's the first half of the squad. Note the "red dot" sightings on the bolters and the really shiny power weapon. The white an purple really do sit well here. I am so chuffed with the outcome. It really is a gigantic step away from the norm for me.

Second half of the squad, this time with the icon and the special weapons. Hopefully the troops look good here too. I kept the colours simple so that I could paint models quickly and raise an awesome spectacle for the battle field that will contrast well with likely opponents (greys, reds, greens and dark colours- you guys know who you are!!!).
This led to the final stage...
Stage 5- Basing, transfers and sealing.
The bases were covered first in bestial brown, then grey gravel, followed by my usual mix of green flock, tea leaves (from really cheap tea bags) and brown fine gravel. Once dried, this was then sealed in using watered down PVA painted over the whole base. My hope is that this will prevent flock dropping off and going everywhere (it really pisses the wife off when she nags me to hoover all the crap up).
I also applied the chapter badge to all the models. This is simply a Slaanesh symbol on the purple shoulder guard. The results were well impressive, though I had to do some crafty trimming with a model knife to get the symbols to sit properly on the shoulder guards. Once dried, this was also sealed using watery PVA glue. Again my hope here is to prevent the transfer sliding off. It does my head in when that happens...

This is a shot of the champion from the rear. Hopefully this illustrates the colour scheme to its fullest, as well as showing a hint of the badge and the detail on the base from using different flocks and gravels.

Same guy with the icon bearer seen from the front. again it shows how truly striking the simplest of colour schemes can be.
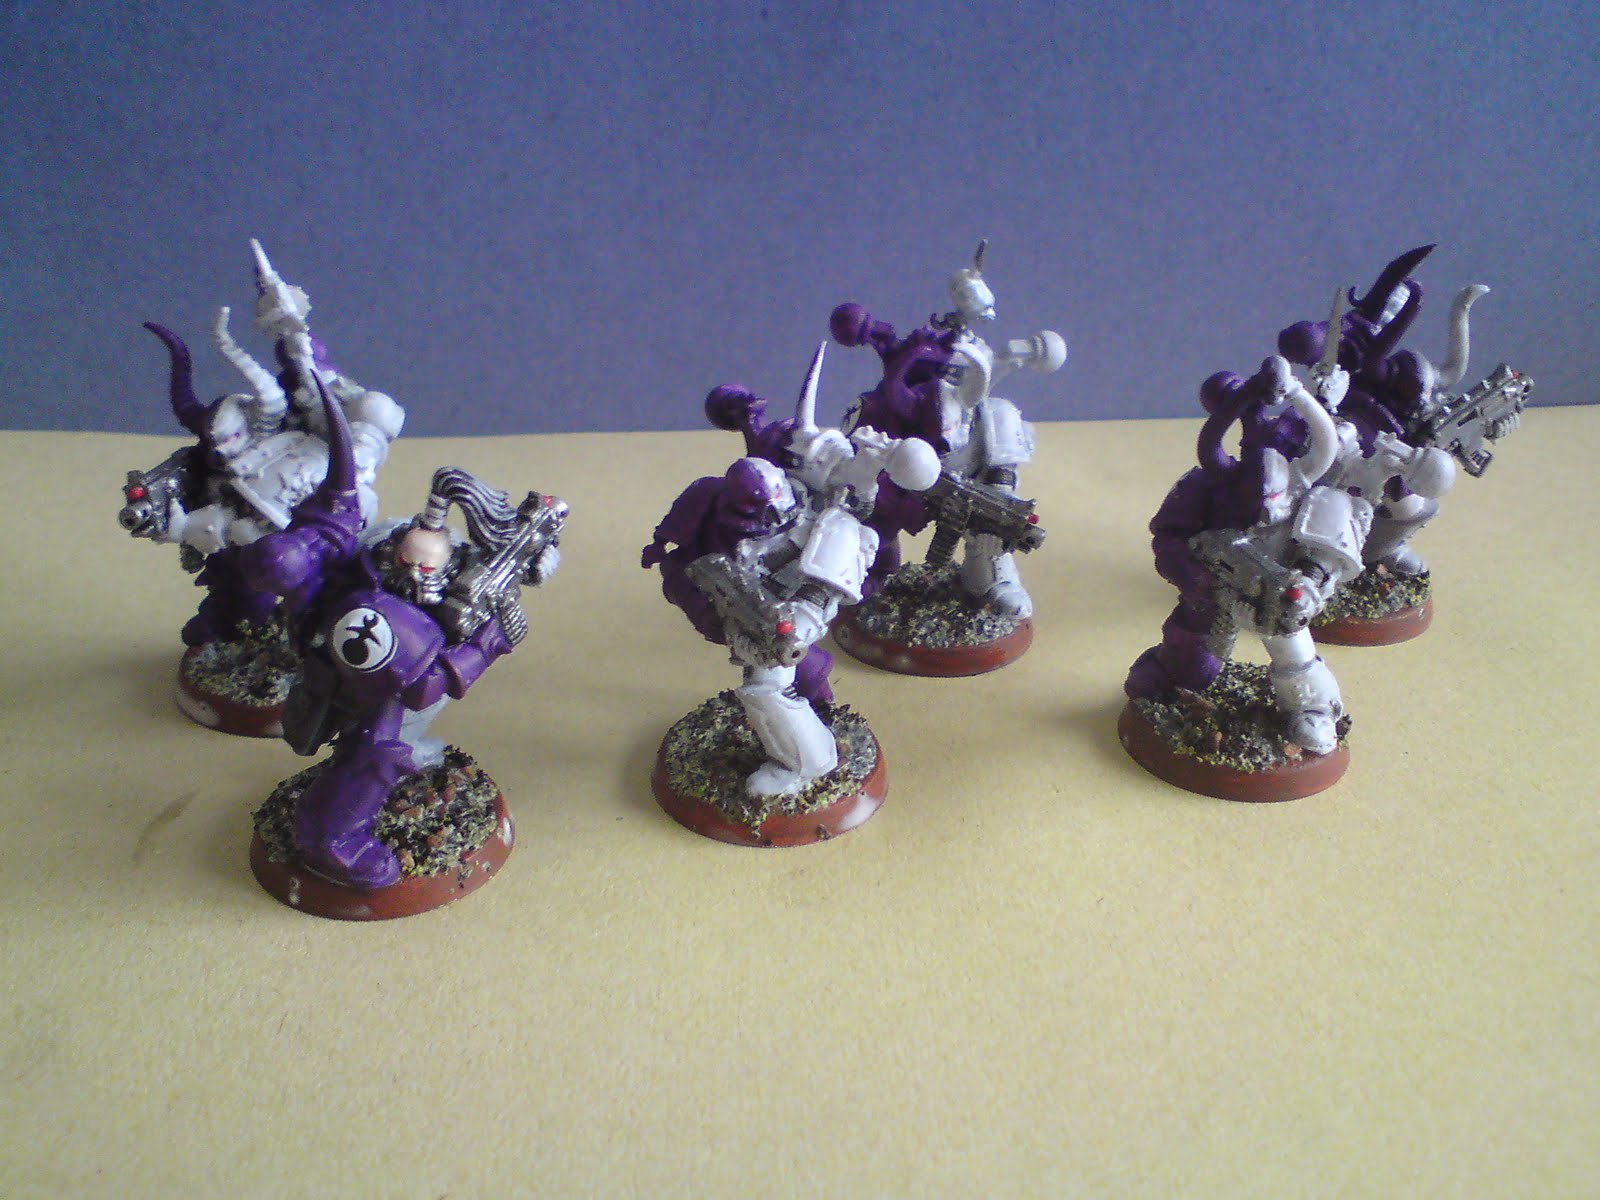
Marines with trusty bolters. The guy at the frontreally does show how cool the Slaaneshi symbol looks. The PVA was still wet when I took this one. Talk about seizing the moment!

These are the two special weapons models in the squad. I went for the flamer to clear out infantry from buildings and cover, and the melta gun for armour and armoured troops. Hopefully this makes the squad a bit versatile in combat, coupled with the benefits of the icon to the god Slaanesh, well nice!

This is the rear view of the Lord, showing the degree of shading I applied to the cloak, as well as highlighting the base detail. The cloak even had a coat of purpler ink applied in the hope it would go a bit "2 tone" the pic doesn't do it justice, and the effect is really very slight. Worth a punt though...

The front view of my lord. I haven't decided what to call him just yet. But it will be something weird and wonderful. Again that striking colour scheme with the symbol of the patron god really makes the model jump out at you.
Well, I hope you liked the case study of how the new army took shape in terms of colour and theme. I am really happy with the bold contrasting colours and that the simplest combination really has proven itself to be very effective.
Now I just have to do it again- for the entire army!!!
Next up for the army will most likely be a rhino and some noise marines or something. I am still musing over various combinations of units and vehicles. The Rhino will be very striking, keeping that two colour scheme, but I need to put a Slaansehi symbol or two on it somewhere, which I have several thoughts on... (heheheh). I am looking to really strech myself there, and if it doesn't work out, then I can simply go back to simple striking colour schemes.
Next up for the army will most likely be a rhino and some noise marines or something. I am still musing over various combinations of units and vehicles. The Rhino will be very striking, keeping that two colour scheme, but I need to put a Slaansehi symbol or two on it somewhere, which I have several thoughts on... (heheheh). I am looking to really strech myself there, and if it doesn't work out, then I can simply go back to simple striking colour schemes.
I am also thinking about raptors, but not as we know them, and chosen too. Again kit bashing may feature heavily, and I'll be sure to keep you all posted!
Stick on your thoughts and verdicts below!
By the way, I will be deleting the space marines and imperial guard posts in the next week or so. Make the most of them while you can!!