Whilst having a poke about in my bits box I came across an old model, and it hit me like a bolt of lightning- a diamond bullet to the forehead as it were!
Thus was born my next project- ULTRAMARINES 3rd Company!
Of course- I don't have the codex yet, but I have played marine armies in the past, so I have at least an idea of what makes up a space marine force.
The model I found was a chaplain- a biker chaplain in fact- that I had reposed and converted into some sad ghost of its former self (a fail). This is the story of how Chaplain Paraxus of the 3rd company came into being...
Stage 1 - BITS!
 This pic shows the bits I collected together. Notice the Khorne Beserker helmet, the space wolf storm bolter and the space wolf back pack banner. I also tracked down a spare shoulder pad, melta bomb and personal banner. The model itself was in for a dramatic series of changes, including a head swap, weapon swap and even the storm bolter was in for some alteration!
Stage 2- Extra bits ready for sticking on!
 Here we see the additional parts are prepped and ready for application. The Beserker helmet has been cut down to just a skull helmet, the backpack now has a personal banner, and I even salvaged a purity seal for the model's old power axe (which has been removed).
Stage 3- OFF WITH HIS HEAD!
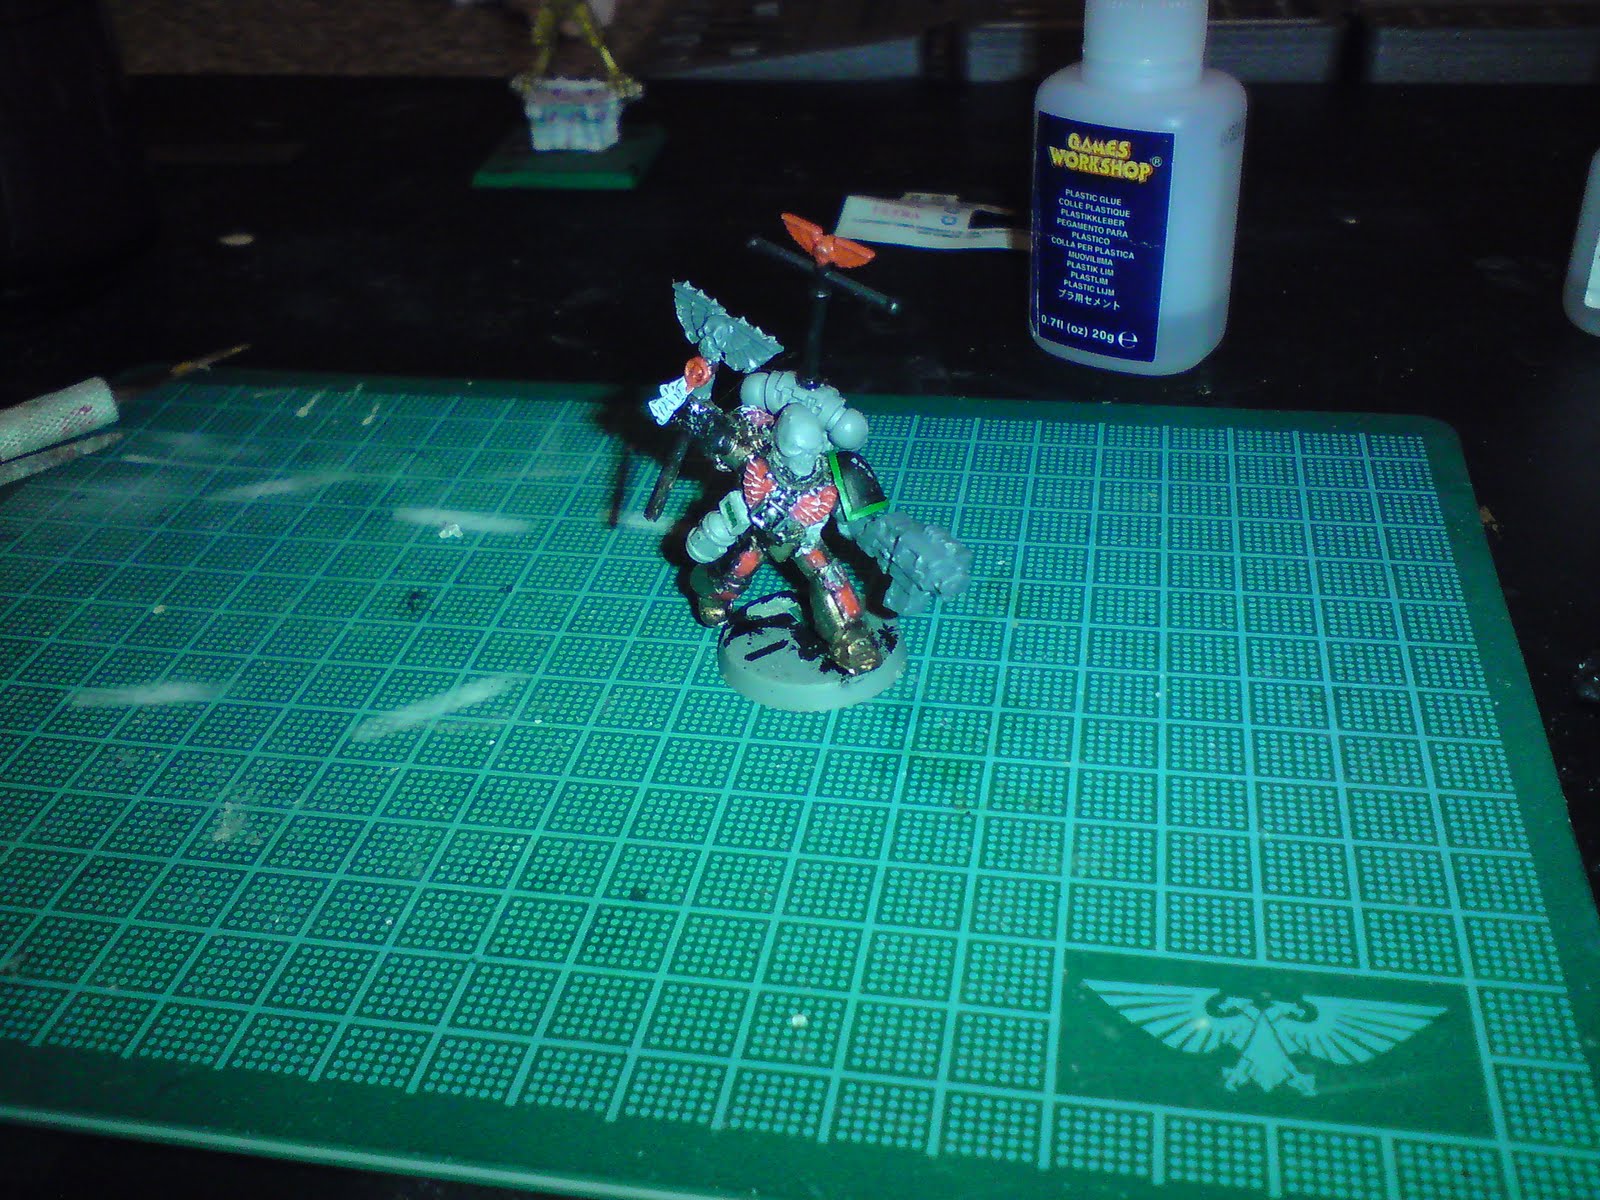
 The model had his head cut clean off with clippers and the the space left was filed flat. The arm socket and left hand were also filed flat to prepare for the component parts to be glued on. This guy was gonna look cool. I had the image now planed firmly in my head. This was the point of no return now, the model was effectively ruined if the parts didn't match the feel of the miniature of if they would not fit. I crossed my fingers and strode on... FOR ULTRAMAR!
STAGE 4- Gluing together.
 This is the finished article, minus obligatory awesome paint job! lol. He is now obiously a space marine chaplain with a storm bolter and crozius arcanum. He is also carrying melta bombs and has a banner pole too. A bit of a chop job all in all, but the skull helmet idea worked in construction ans the converted weapons etc really do give him the feel of a hard S.O.B.
He was then left overnight for the glue to fully set ( patients is NOT a strong point of mine).
Stage 5- Colour selection.
 Here he is again, stood on the mixing tile with my brushes, transfers, water pot and paints behind him. It always pays to have a good look at the model before you start with painting and select the colours you need according to the shades and textures you want to create. Chaplains wear black, the Ultramarines colour is blue, and the third company are denoted by red banding on the shoulder pads. I also had to consider the banner pole and what I would do about that. New territory for me there, as I usually leave it if I don't have a sticker to hand.
Stage 6- Undercoating.
 Black undercoats seem to work for everything (except yellow for some reason- go figure!), and as this model will be wearing black power armour, its the perfect choice. A good even coat is important, as we all know to achieving that all important shading later on. Black is also great as an undercoat for metallic colours (The silver ghosts proved that). According to my source texts (old codexes) Ultramarines achieve best results over a black undercoat too. I'll remember that when the squads star rolling in!
Stage 7- Base coating.
 All the base coat colours have been applied here, including bestial brown for the base. I also threw on a bit of tank track to the base to cover the slot and add character to the model. The base coat of black was pretty much already on, so the power armour got a very fine drybrush of Elf Grey.
Stage 8- Shading and detail work.
 Here the model is highlighted and fine details are picked out, such as the eyes and the text on the purity seals. The eagle motif and skull helmet have been drybrushed progressively light up to white. The Blue shoulder guard with red trim is ready now for the final stages of modelling-transfers.
I also started work on the banner for his banner pole.
 A side on shot, showing how little a space there is to work on on the shoulder guard, with the back pack taking up precious moving space for the transfers.
Stage 9- Finishing touches
 Here he is the finished article! The base is flocked with brown gravel, green flock and tea leaves (super cheap ones!!) all mixed together to give the effect you see there. The banner I kept simple as possible, but the blue with red bordering of the third company symbolism remains. The Ultra symbol in red with a skull in denotes a chaplain, with the romnan numeral 3 to indicate the company he serves in. I never like the way that the Ultramarines transfers stick on the shoulder guards- its a proper pain in the arse. I am figuring out a way around this now by trimming the transfer down to give it more flexibility when being applied. I love the way the eyes seem to sparkle too, it brings the model to life in an eerie way, that I like alot.
 There's the shoulder guard with the transfers applied. The "3" on the Ultra symbol really looks kinda cool- I was well happy with that. The skulls on the storm bolter also stick out a little, accentuating the firepower the Chaplain carries.
 This last "fuzzy shot" shows the Army marking. The skull in the yellow cricle is, as far as I can remember, a typical army badge used by space marines on campaign. By using this army badge, I can include elements of the first and tenth companies in the force and tie them all in together with the campaign badge.
THE NEXT STEP
Well, I have an HQ choice now, so I guess I need to think about his subordinates. Chances are that the battle force boxed set will do for starters, along with the codex.
I really want to make this army look special, so will take ages on the troops and vehicles. I'll try out some new techniques and convert and personalise as much as possible.
The third company are known as "the scourge of the xenos" afer their honours won in the first Tyrannic war.
That opens possibilities for Tyrannic Veterans, as well as trophies of genestealers and other xenos races for the characters and vehicles.
Watch this space! More is sure to follow as the army grows.
Also coming up...
Battle will be joined in the next few days, so expect battle reports and tales of glory and heroism galore!
Good to see you back converting new models, mate. Have to say I'm surprised you went for Ultramarines - nice to see you on the RIGHT side!
ReplyDeleteWell, I am planning to go dark again later on, probably with further expansion to the black legion (noise marines are growing on me and thousand sons are harder, plus I need more daemons and icon bearers...) and I may even venture into daemon forces who knows? Till then, I plan to build a large Ultramarines army with everything in it so I can truly be ultimately flexible in force selections. There are some truly incredible models out there for marines now, and I reckon they are worth exploring and testing my mettle on.
ReplyDelete